Oracle 11g Client Installation Step by Step
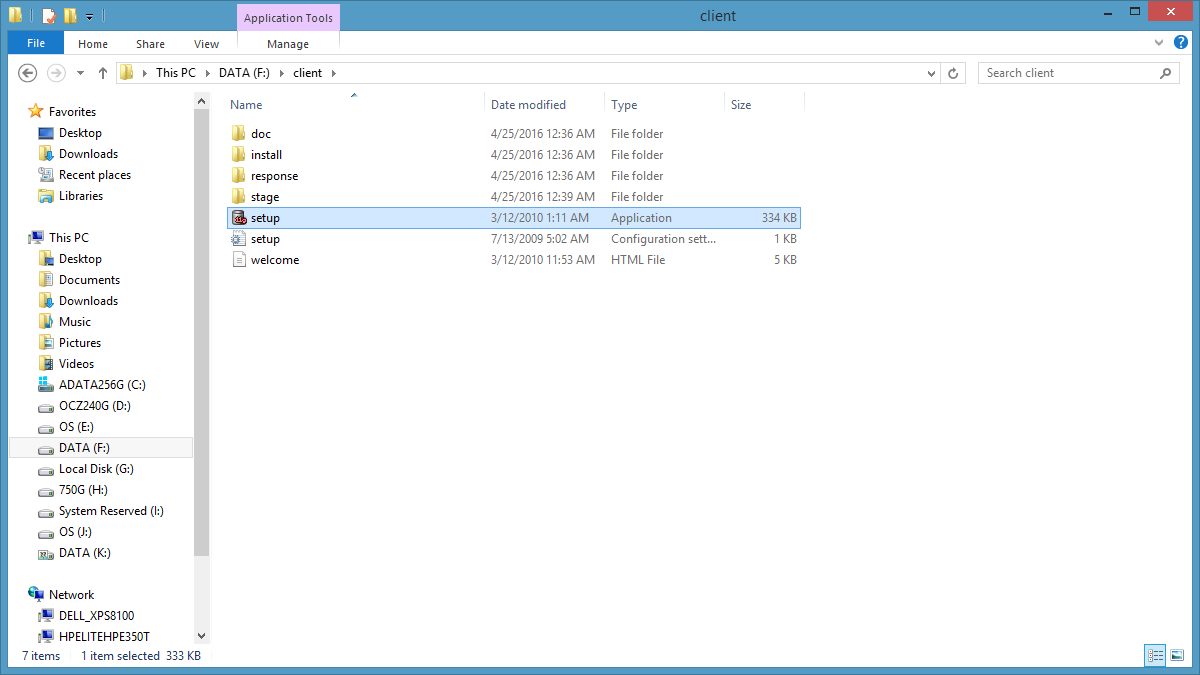
Unzip downloaded file, launch SETUP
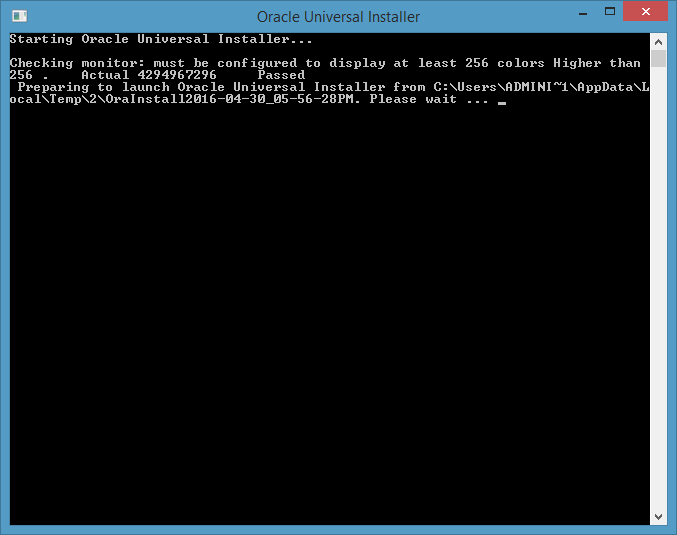
Checking system.......
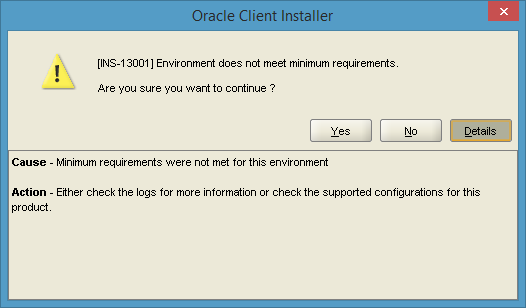
Skip environment requirements error
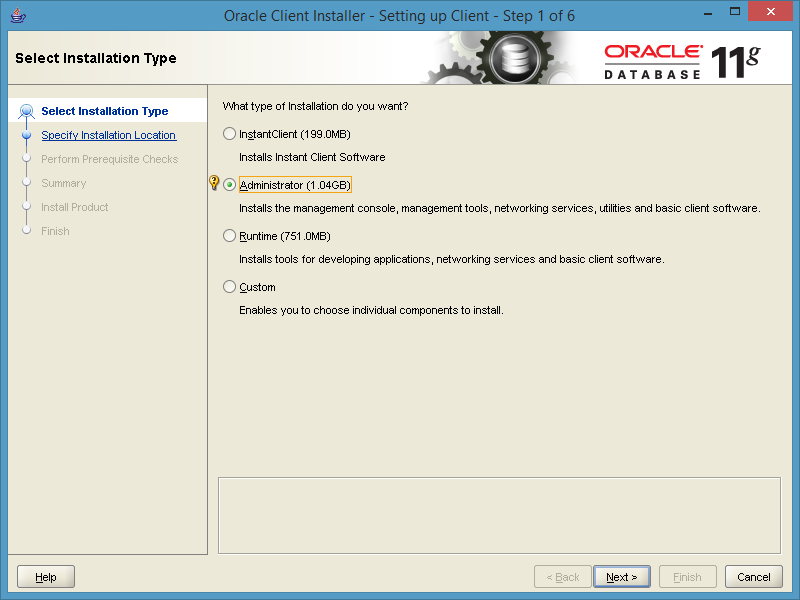
Select installation type
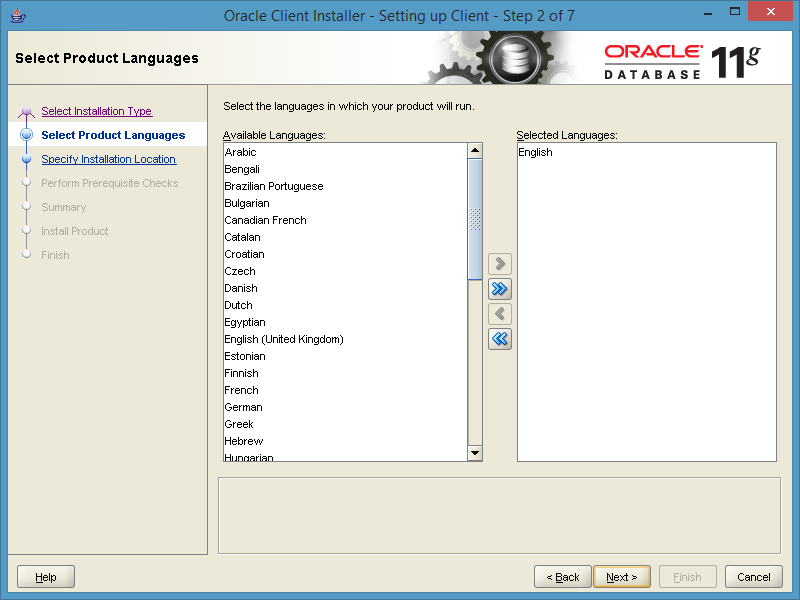
Select language
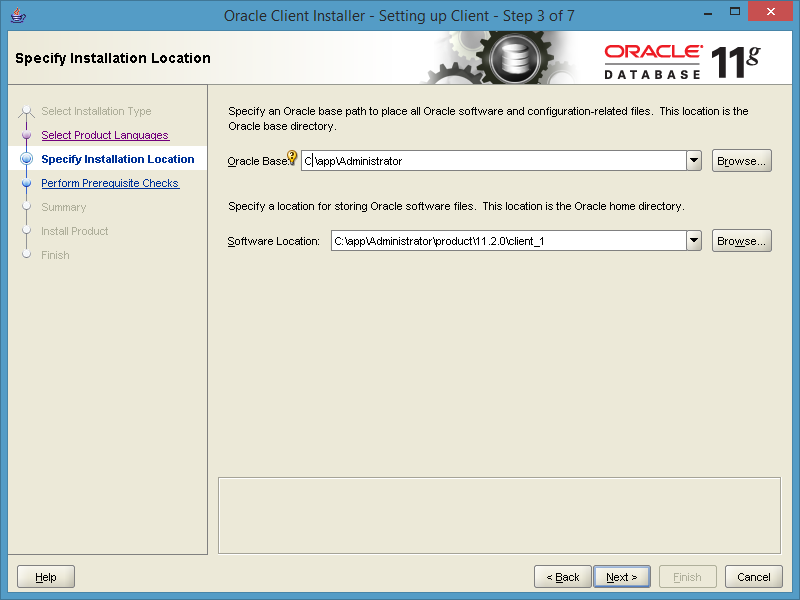
Specify installation location
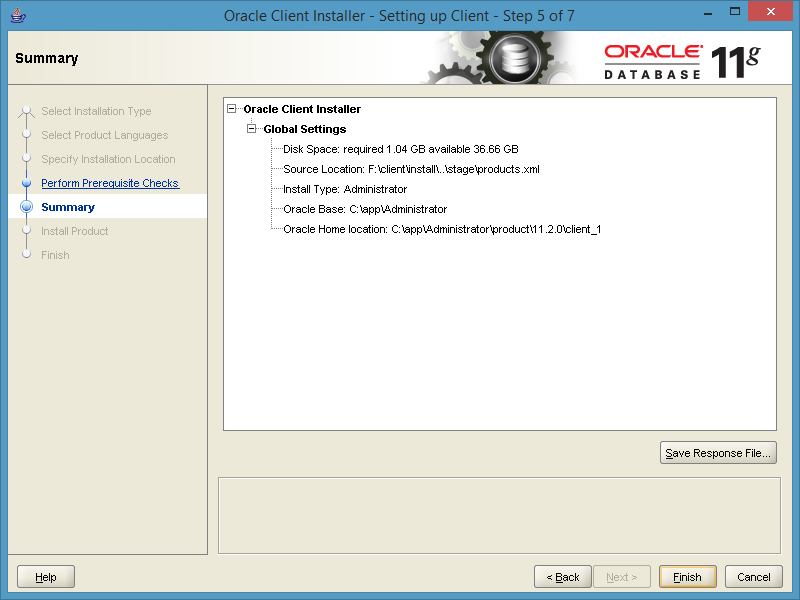
Summary
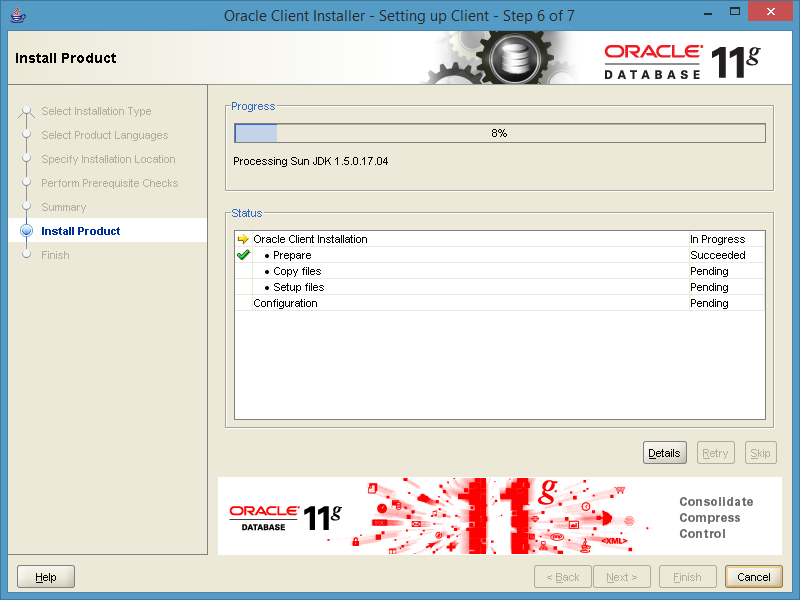
Install product
Allow access if firewall prompt

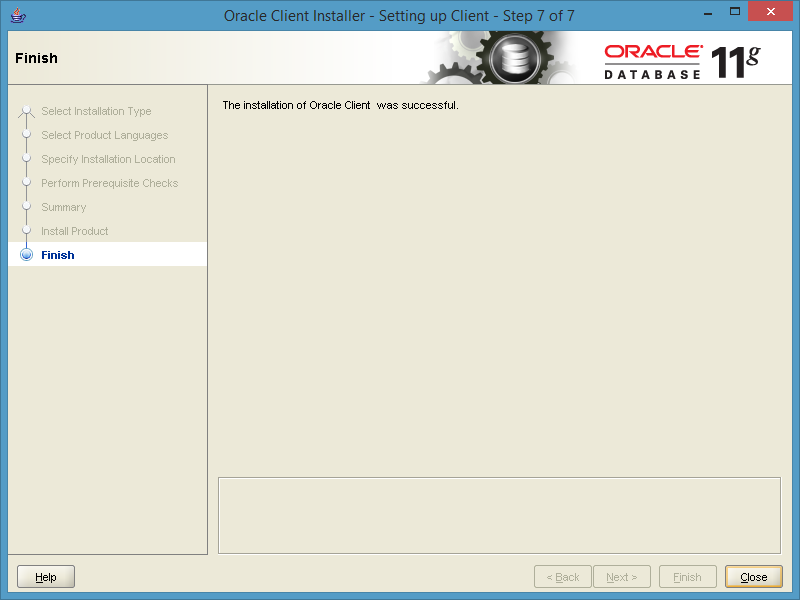
nt&path=57257fa904cdd.png)Finish
Start Net Manager to config TNS
Start->All Programs->Oracle - OraClient11g_home1->Oracle - OraClient11g_home1->Net Manager
Expend Local -> Highlight Service Naming -> Click on green plus icon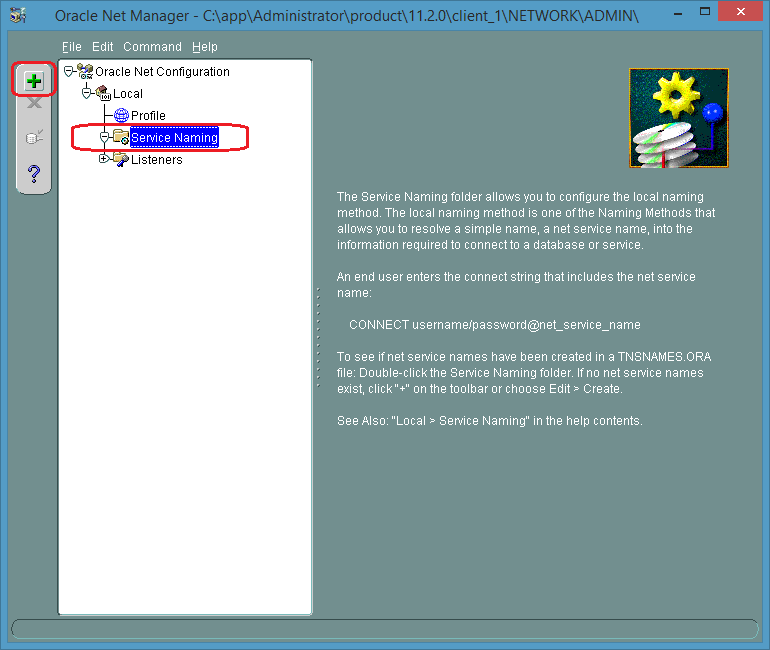
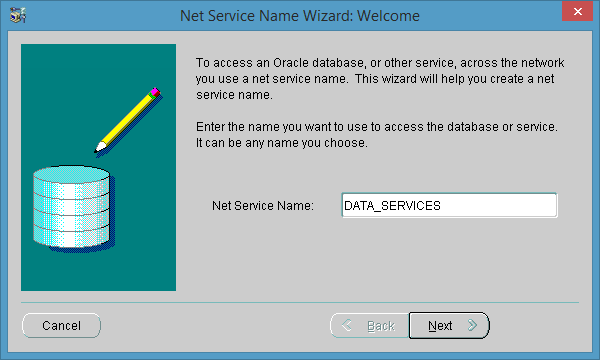
Enter net service name
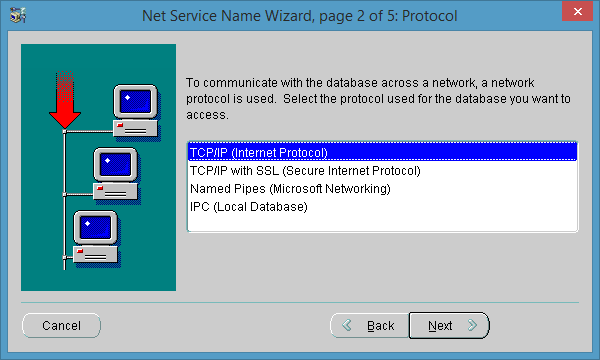
Select TCP/IP
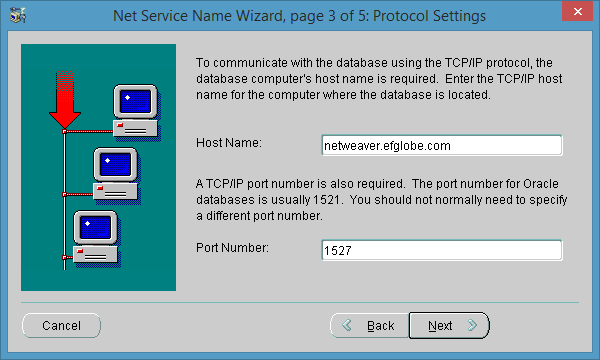
Configure host name and port
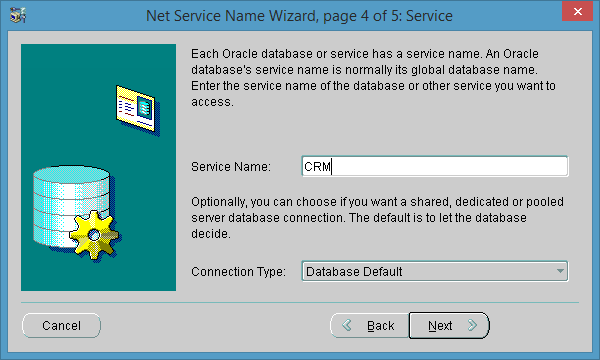
configure service name
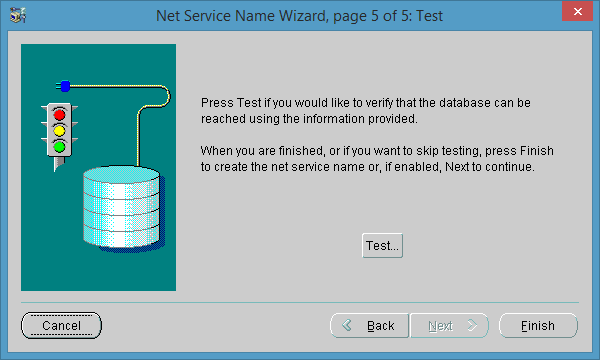
Finish
Summary
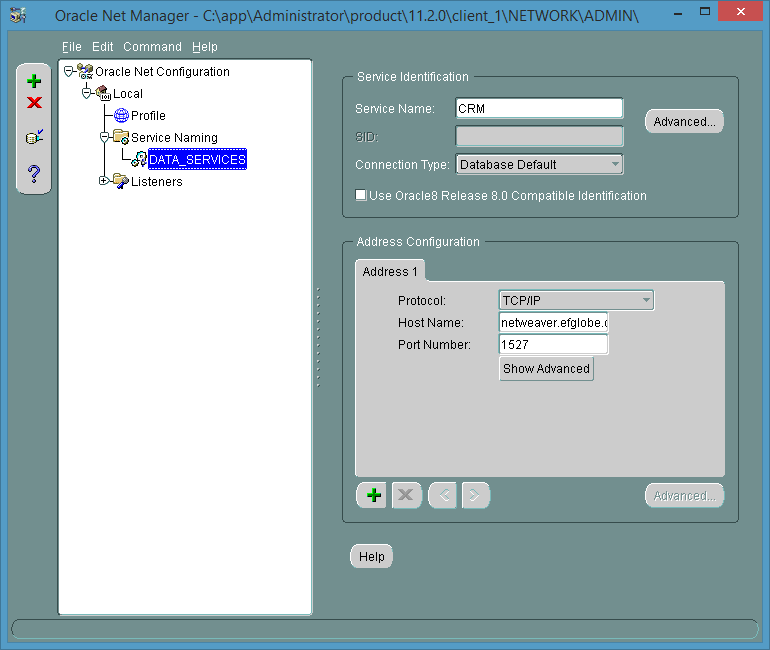
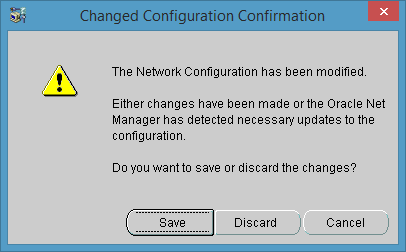
Click on X to close windows then select save settings
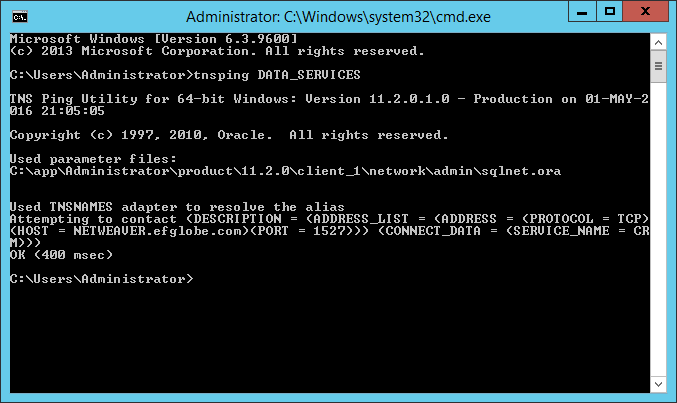
Open DOS prompt windows to test with TNSPING
Oracle 11g Client Installation Step by Step
-------------------------------------------
1. Unzip downloaded file, launch SETUP

2. Checking system.......

3. Skip environment requirements error

4. Select installation type

5. Select language

6. Specify installation location

7. Summary

8. Install product

9. Allow access if firewall prompt

nt&path=57257fa904cdd.png)
10. Finish

11. Start Net Manager to config TNS
Start->All Programs->Oracle - OraClient11g_home1->Oracle - OraClient11g_home1->Net Manager
Expend Local -> Highlight Service Naming -> Click on green plus icon

12. Enter net service name

13. Select TCP/IP

14. Configure host name and port

15. configure service name

16. Finish

17. Summary

18. Click on X to close windows then select save settings

19. Open DOS prompt windows to test with TNSPING

Perfect is not enough - must be irreplaceable!
edited May 2 '16 at 2:11 am